EVOLVE Titleblocks - Setup and Configuration
![]() Updated 1 year ago
by
Adam Heon
Updated 1 year ago
by
Adam Heon
Important: The following pertains to the EVOLVE 6.2 version and up, while EVOLVE supports the previous titleblock families, the new family detailed below provides better user controls to make setup easier and additional functions that the previous family did not have.
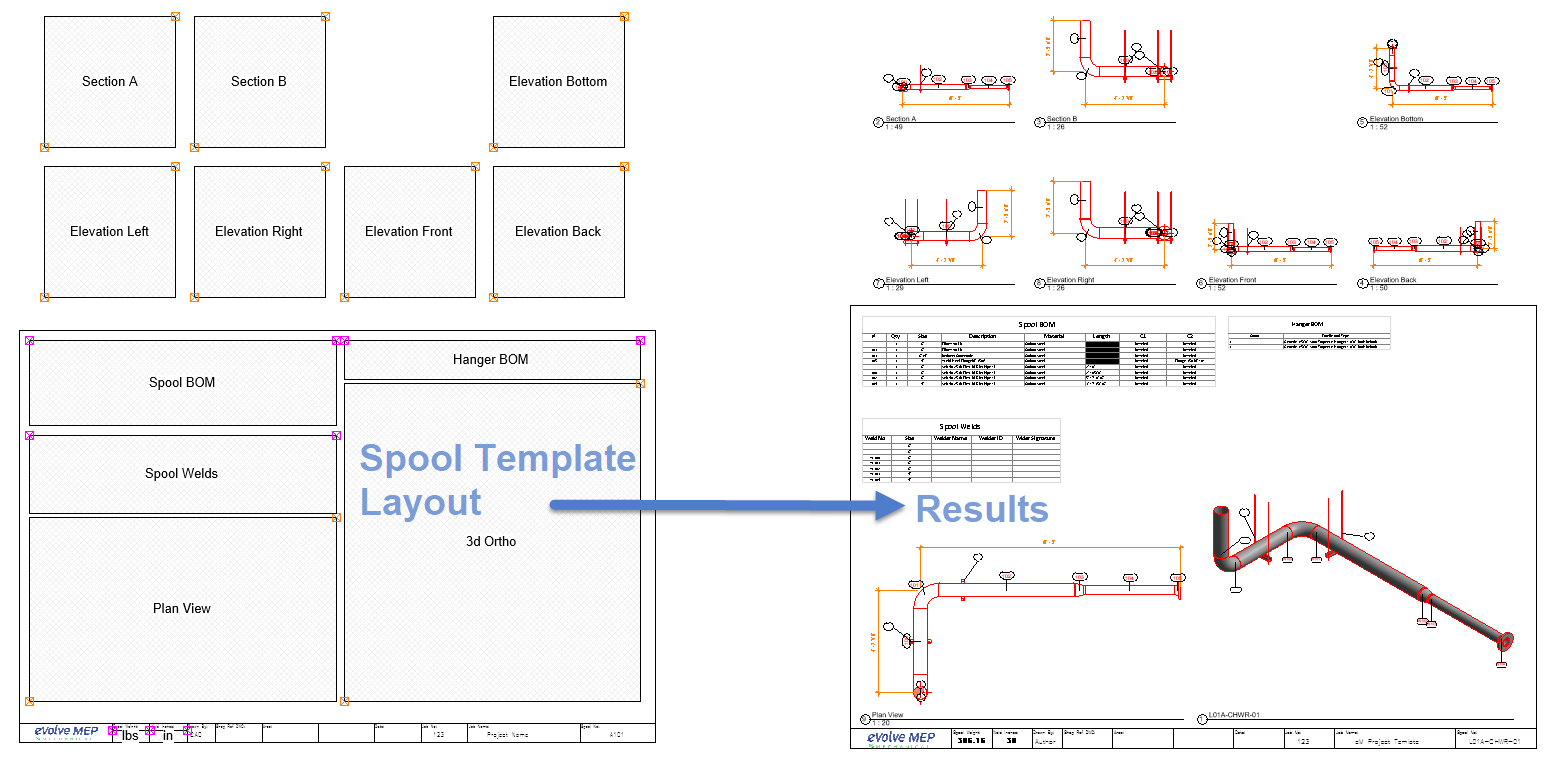
Titleblocks that need to be used within any of the EVOLVE features that create sheets/views/schedules, the titleblock family must contain a family called eV_View Window which is used to define the properties of the Views and Schedules that EVOLVE creates.
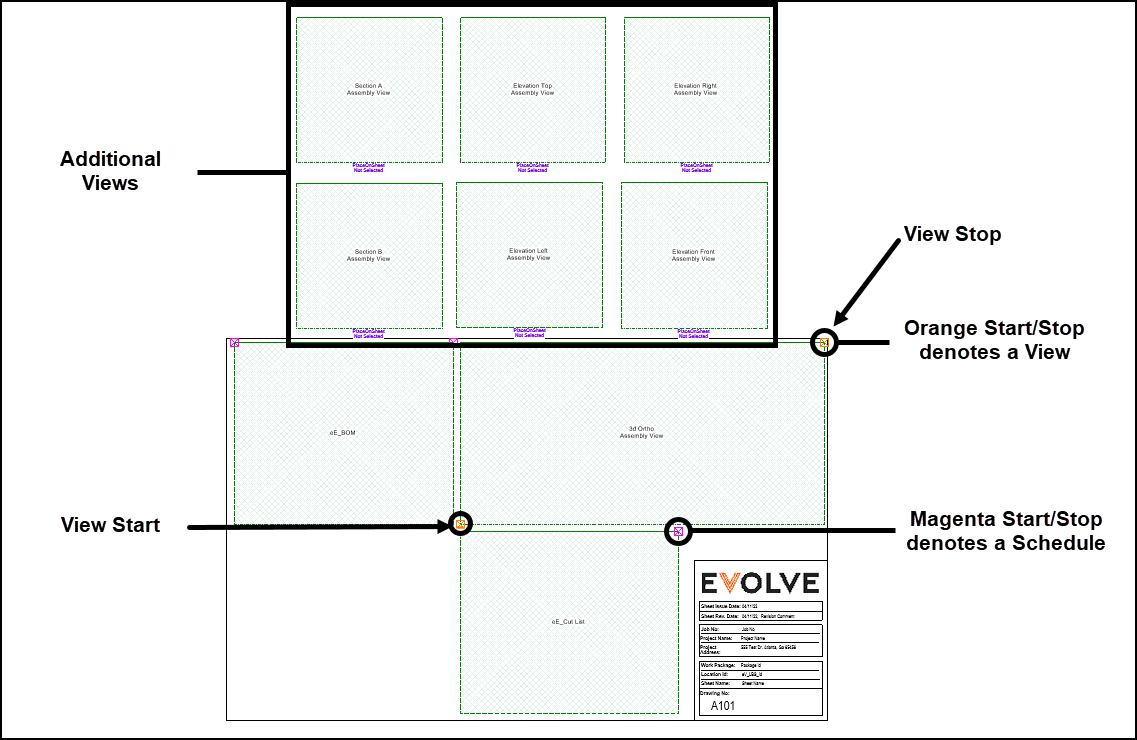
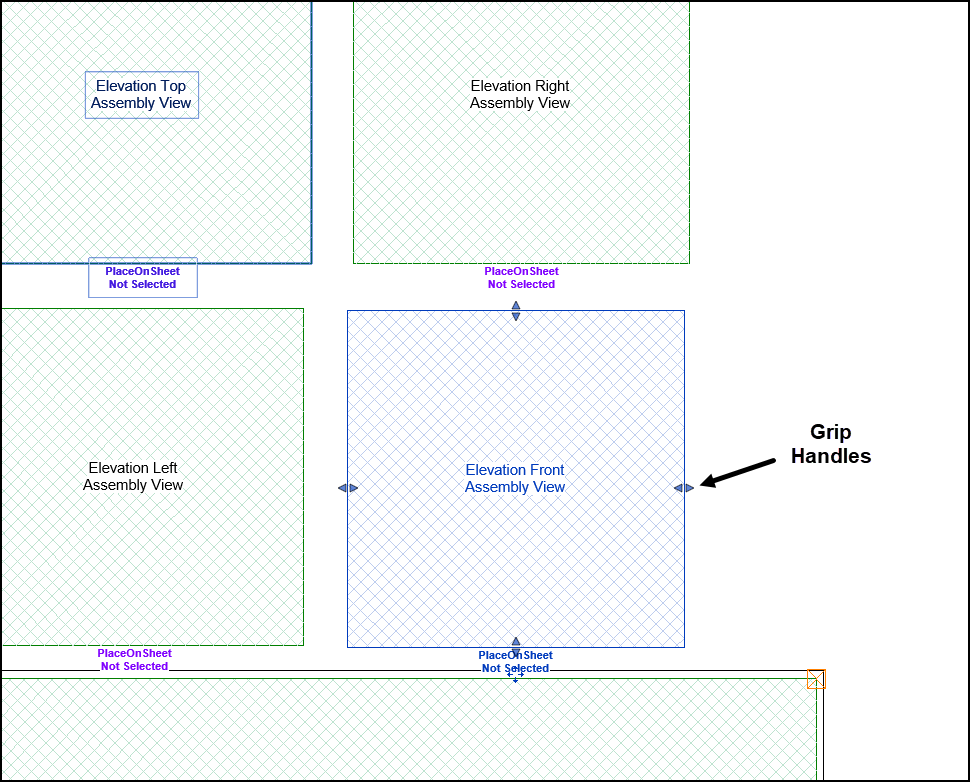
The View Window family is multi-functional and created in a way to easily select views, assign view templates, and resize viewports. To apply to other titleblocks, simply load the eV_View Window_v3 family along with the View Templates into a project. The included titleblock templates contains additional views displayed outside the bounds of the sheet which may be swapped with existing views or added to the sheet. Depending on the selected type, the Start/Stops are color coded to visually identifying the view type.
Options for the View Window Family
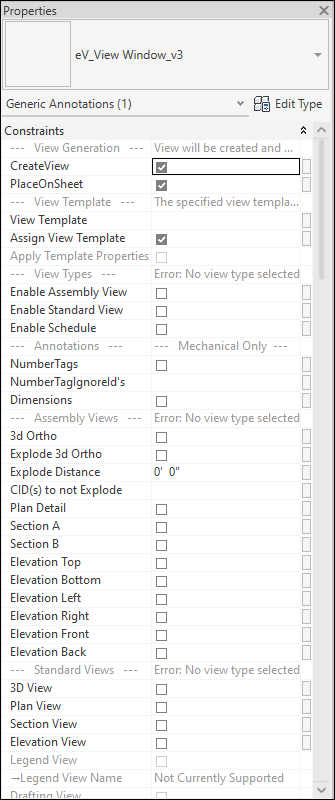
PlaceOnSheet – when checked, the view(s) appear on generated sheets. When unchecked, the views are still created and may be found under Assemblies in the Project Browser
Annotations:
NumberTags- Check this box to have Number Tags displayed on this view
NumberTagsIgnoreId's- For additional controls over what elements get NumberTags, input the Service Type index (This is not CID) to be ignored. For example, 57,58,101, will NOT place an Item Number tag on Welds, Joints, or Couplings.
Dimensions- Check this box to have Dimensions displayed on this view
View Options:
Use Custom View Title- If left unselected, a generic view title will be created based on the View Type selection
Custom View Title- Specify the Custom View Title to be used. This can be changed after Sheet creation via the "Title on Sheet" View parameter or by engaging directly with the View Title.
View Template-When a View Template is specified, the View Template will be applied to the View OR the View Template's Properties will be applied to the View, based on the Spool Settings. Must enter a view template that exists in project being used.
Detail Number- This value must be unique for each View. The value is not limited to numbers.
Scale to Fit- When selected, a Custom Scale will be assigned to the View based on the View Extents of the View Window. If a View Template has been specified and includes a Scale, that Scale will be overridden with the Custom Scale.
View Extents: Caution: Making View Windows too small can have unexpected and/or undesirable effects.
Height- user definable and displays the current height of the selected view
Width- user definable and displays the current width of the selected view
Select (1) View Type:
Currently Selected View Type- Displays the currently selected view type
Standard Views: - Can be used in Spools, Packaging, and Locations
3D View, Plan View, Section View, & Elevation View
Section/Elevation Direction:
Currently Selected Direction- Displays the Currently Selected Direction
North, South, East, West
Assembly Views: Can only be used in spools
3d Ortho
Section A, Section B
Elevation Top, Elevation Bottom,
Elevation Left, Elevation Right, Elevation Front, Elevation Back
Schedules:
Standard Schedule- If selected, a Schedule Name must be specified in the "Standard Schedule Name" parameter below.
Standard Schedule Name- Specify the name of the schedule to be used
Spool Part List (Multi-Category)- Can only be used within spool sheets
Spool Part List (Single Category)- Can only be used within Spool Sheets. If selected, a Revit Model Category must be specified in the "Spool Part List Model Category" text parameter below.
Spool Part List Model Category- Specify the Model Category to be used in the Single Category Part List. Examples: Conduit, Conduit Fittings, Electrical Equipment, Lighting Fixtures, Duct, Duct Fittings, Mechanical Equipment, Pipe, Pipe Fittings, Pipe Accessories.
Tips and Tricks:
- Standard Schedules may not be used on a spool sheet.
Troubleshooting:
When improper selections have been made, this family will alert of the error and explain why it occurred.
Visual Error Signs:
- The Hatching in the view window will Display as red (instead of green)
- A red X will display on the View Window
- The View Nodes will no longer display
Error Display Parameters:
Currently Selected View Type- will report errors related to view type selection/s
Currently Selected Direction- will report errors related to direction selection/s
View Label on the family- When a Valid View Type selection is made, the View Label on the View Window will report the selection, the appropriate View Nodes will display, and the View Window hatching will display as green.