EVOLVE Shop - Submit Spool
![]() Updated 2 years ago
by
Kerry Poe
Updated 2 years ago
by
Kerry Poe
EVOLVE Shop - Submit Spools
Summary
The Submit Spools window contains tabs used to map Revit Spools to Shop Work Requests, define export items, and preview data before publishing to the Shop module.
- eVolve tab ⮞ Integrations panel ⮞ EVOLVE Shop menu ⮞ Submit Spools button


Prerequisites
- The proper Shop project must be associated with the current active model.
- All desired Work Requests must be created in the Shop module on https://foresite.evolvemep.com/

Usage
Associating Revit Spools and Shop Work Requests
- From the eVolve ribbon, in the Integrations panel, expand the EVOLVE Shop menu, and click Submit Spools.
- From the Submit Spools window, from the Map Revit Spools to Shop Work Requests tab, you may either drag and drop the a spool to a work request or a work request to a spool.


Window Overview
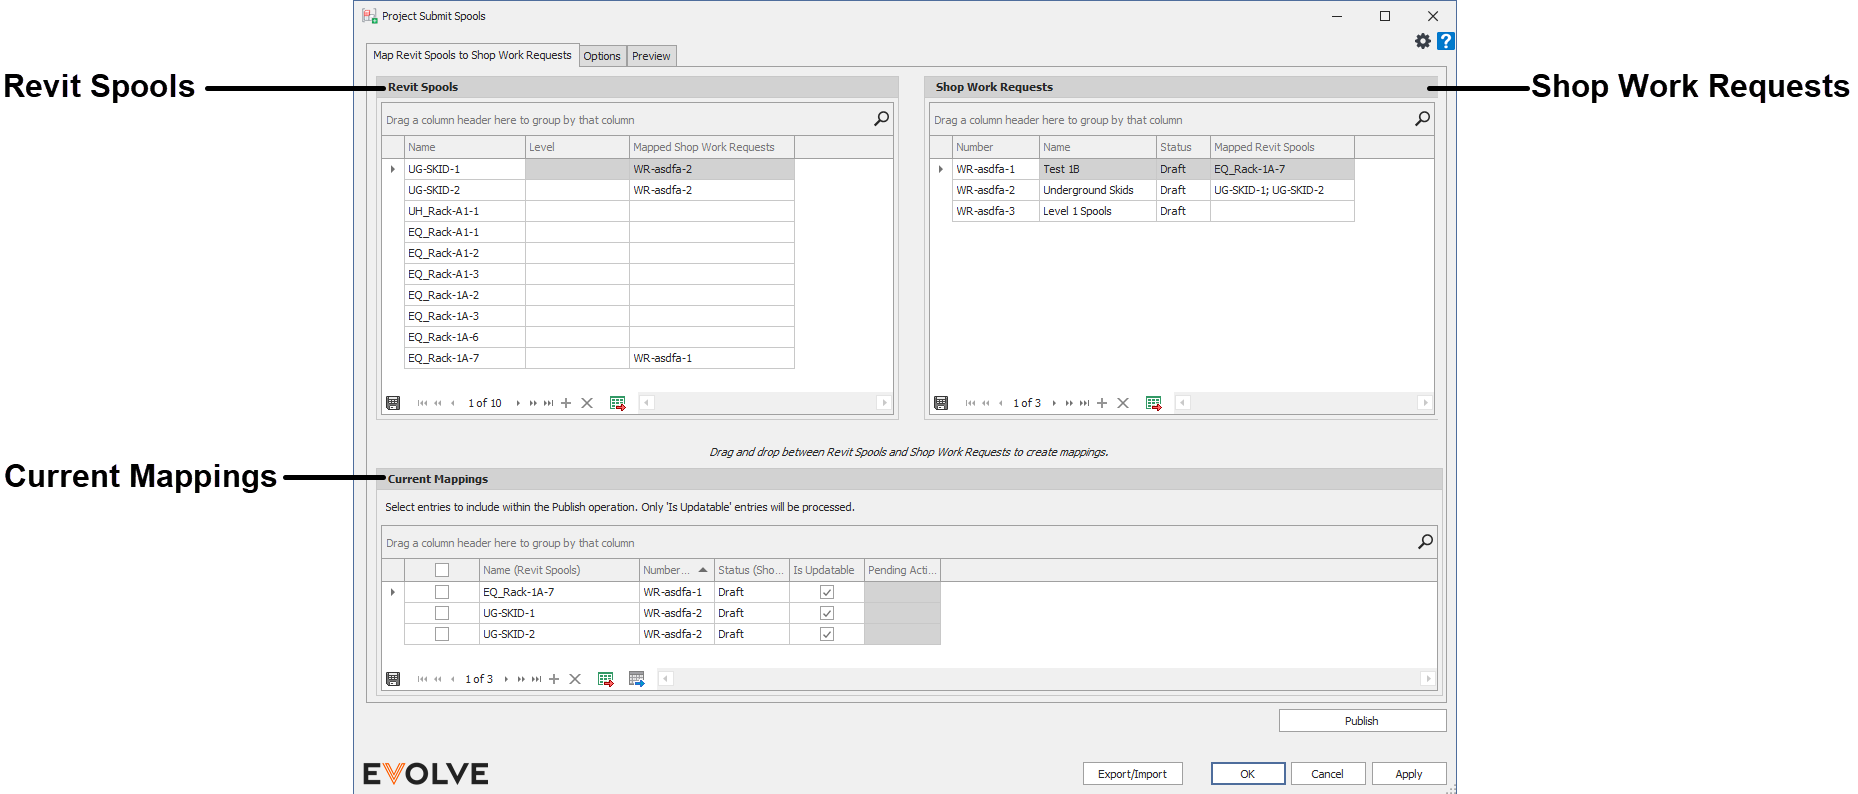
Submit Spool - Map Revit Spools to Shop Work Requests
- Revit Spools panel - displays the available spools in the current active Revit project.
- Shop Work Requests panel - displays the available Work Requests of the associated Shop project.
- Current Mappings panel - displays a summary of the associated Revit Spools and Shop Work Requests waiting to be published.
- Publish button - the Publish button is displayed on all tabs and is used to issue the assigned Revit Spools to the Shop Work Requests for the associated Shop Project.
Submit Spool - Options
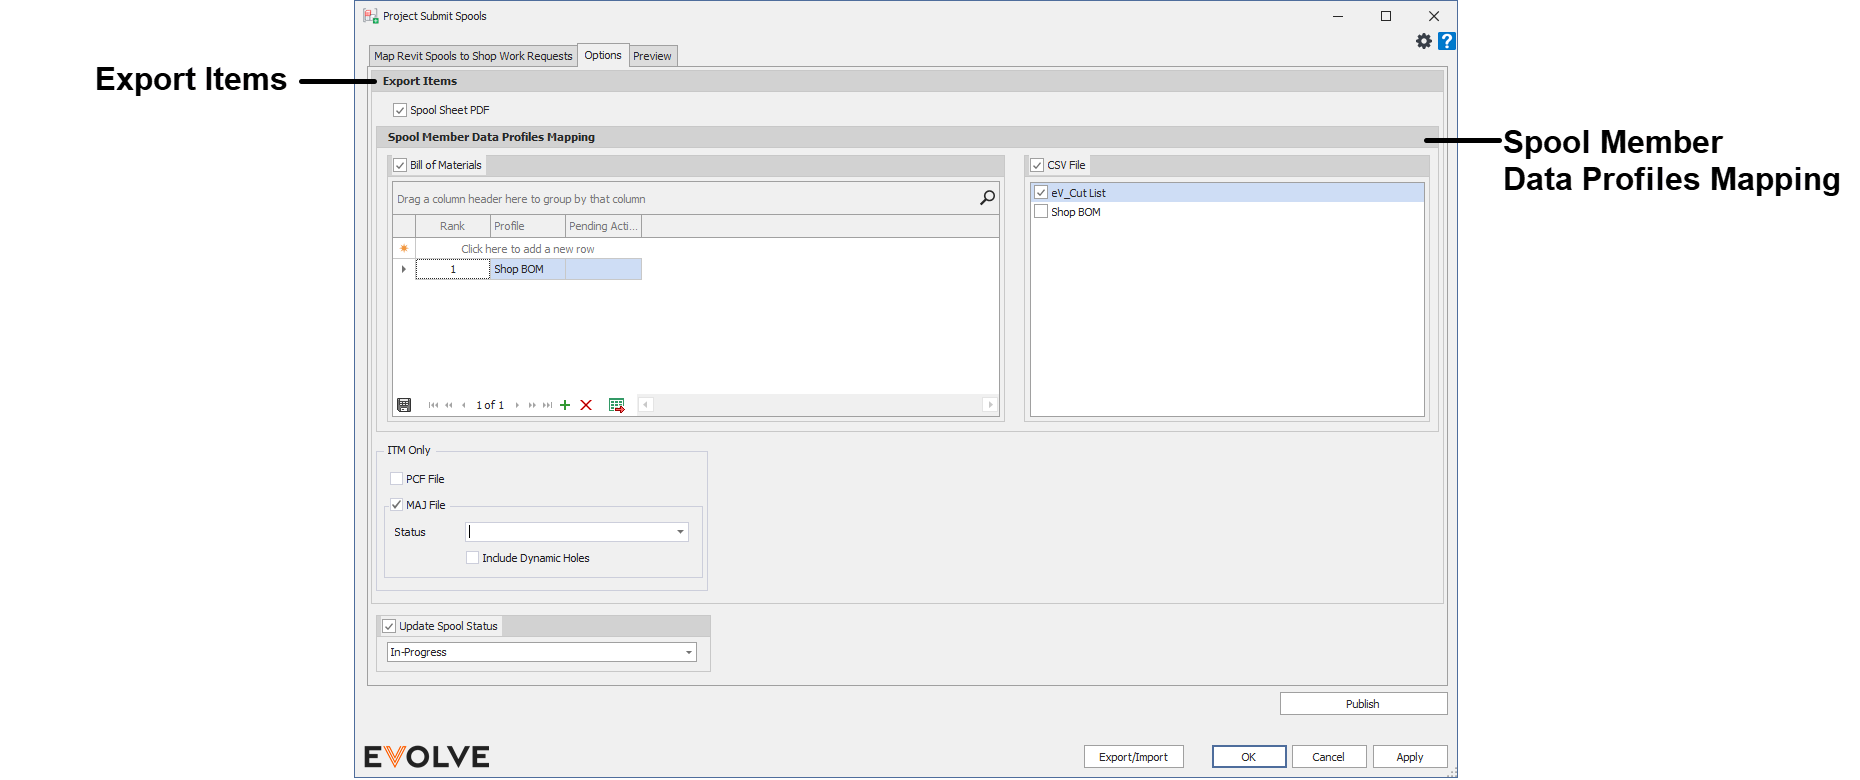
- Export Items panel
- Spool Sheet PDF checkbox - when checked, PDFs of the spool sheet(s) are included when the current items are published.
- Spool Member Data Profiles Mapping panel
By default, the minimum amount of data needed to associate a spool with a work request is sent to Shop. However, the default data sent is most likely not the desired information needed to create a bill of material to send to a customer. - Bill of Materials checkbox - when checked, the loaded Data Profile(s) are used to resolve the currently mapped elements.
- Bill of Materials grid - used to set, rank, and display the loaded Data Profile(s).
- NOTE: if an element adheres to multiple data profiles, the Rank will determine which data profile to use.
- Bill of Materials grid - used to set, rank, and display the loaded Data Profile(s).
- CSV File checkbox panel - when checked, a CSV file for each selected Data Profile is sent when the current items are published.
- ITM Only panel
- PCF File checkbox - when checked, a PCF file is included with the submittal.
- MAJ File checkbox - when checked, an MAJ file is included with the submittal.
- Status menu - displays the available fabrication statuses.
- Include Dynamic Holes checkbox - when checked, Dynamic Hole information and geometry is included with the submittal.
- Update Spool Status checkbox - when checked, the spool status is modified to the selected option in the menu.
- Update Spool Status menu - displays the available statuses.
Submit Spool - Preview
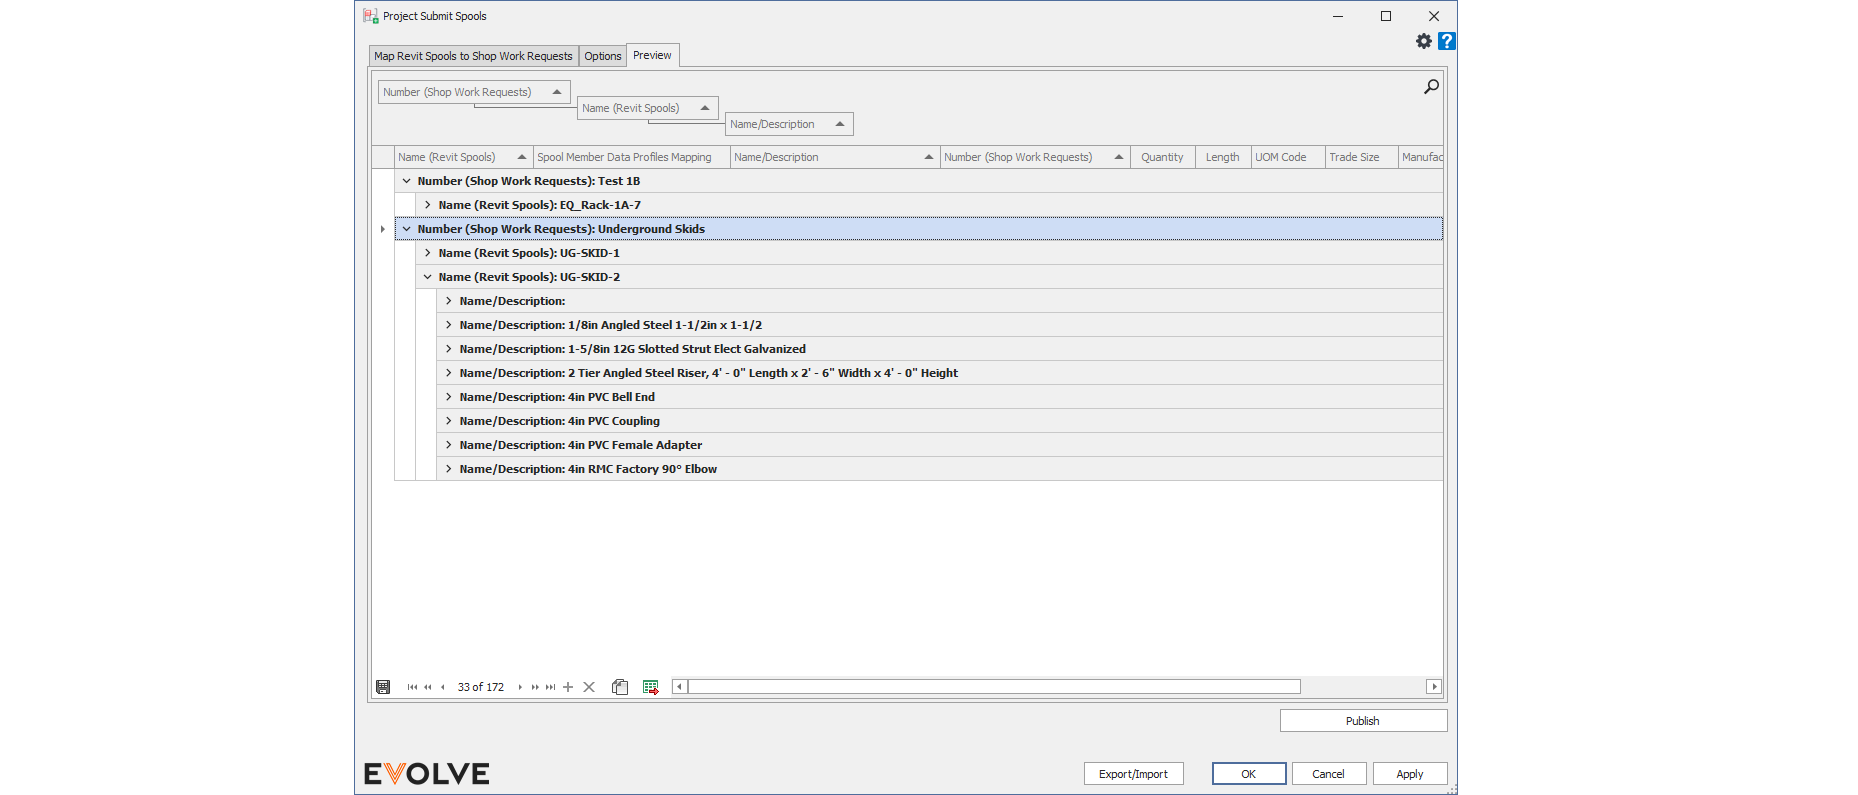
The grid is populated based on the Data Profile(s) loaded in the Spool Member Data Profiles Mapping/Bill of Materials grid on the Options tab and is used to review the current proposed spool/work request mapping information before publishing.

Tips and Tricks
- Multiple spools may be dragged to a work request
