Hanger Placement


Summary
Hanger Placement allows you to automatically place single and trapeze-style hangers along a run of elements. Hangers may be placed along the path of elements to a change of direction, like a bend, tee, etc.
- eVolve tab ⮞ Supports panel ⮞ Hanger Placement button


Prerequisites

Usage
- From the eVolve ribbon, in the Supports panel, click Hanger Placement.
- From the Hanger Placement window, select the required Profile and Mode, and set the desired Attach To option, then click OK.
NOTE: If a placement profile has not yet been defined, go to Hanger Settings and build one. - From the drawing area, select the desired parallel straights to place hangers and click 'Finish'.

Window Overview
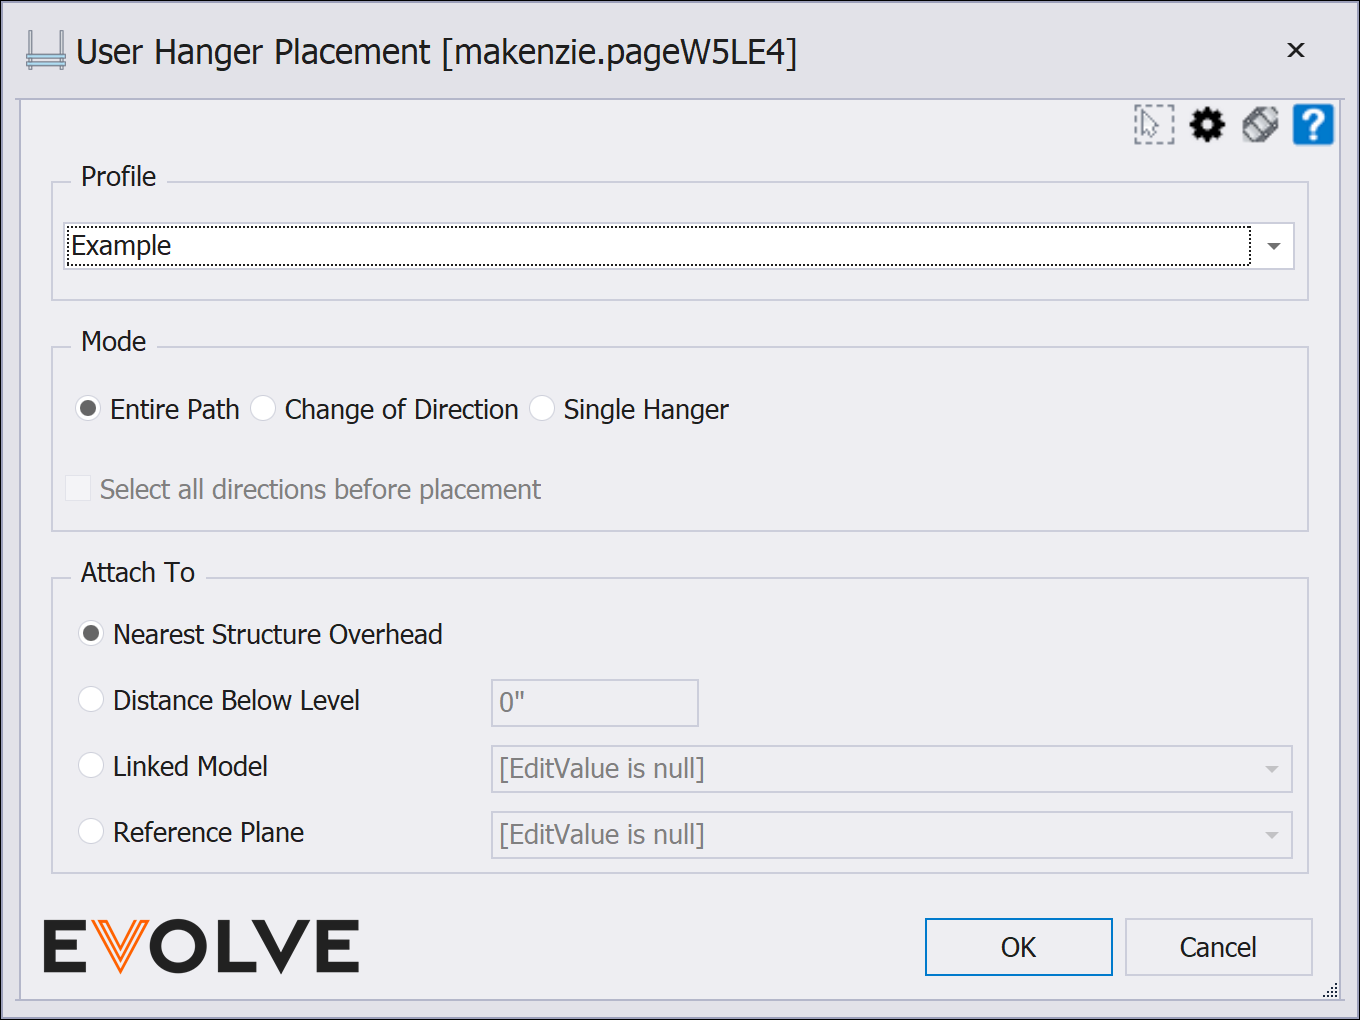
Hanger Placement window
NOTE: The Hanger Placement's predefined selection filter can be modified via the Selection Configuration. Please see the link in the Relevant Articles below.
- Profile panel menu
- Displays a list of available placement profiles
- Mode Panel
- Entire Path - when selected, hangers are placed along the entire connected run.
- Change of Direction - when selected, hangers are placed until a change of direction is reached, like an elbow, tee, cross, etc.
- Single Hanger - allows users to point and click to place a hanger.
NOTE: after placing a hanger, the command remains active until canceled by the user so that multiple hangers may be placed.
- Select all directions before placement - When selected, rather than picking elements and a direction before placement occurs, element and direction selection will be repeated until finished, and then all placements will occur at once.
NOTE: This option is only enabled when the 'Change of Direction' radio button is selected for the placement Mode. - Create unfiltered view for placement checkbox - hanger placement creates a temporary unfiltered 3D view when enabled. This yields the most accurate results but increases processing time. When disabled, only elements in the current view are processed. This mode may yield faster results but does not consider elements that are not visible in the current view.
- Attach To panel
- Nearest Structure Overhead radio button - evaluates the host model and all "loaded" linked models and attaches to the nearest structure element.
- Distance Below Level radio button dialog box- evaluates the host model and attaches to the nearest level overhead. The input value reduces the rod length below the level to compensate for the floor thickness.
- Linked Model radio button menu - evaluates the specified linked model and attaches to the nearest structure element. The menu displays a list of all "loaded" linked models.
- Reference Plane radio button menu - evaluates the host model and attaches to the specified Reference Plane.
NOTE: Distance Below Level and Linked Model are only available when using a Family (RFA) based hanger profile.

Tips and Tricks
- For crowded areas such as electrical rooms use Change of Direction combined with Select all directions before placement to quickly place hangers on multiple sets of parallel conduits.
