Annotation Settings
![]() Updated 3 years ago
by
Kerry Poe
Updated 3 years ago
by
Kerry Poe
Annotation Settings

Summary
To provide users with a custom-tailored annotation experience, we drive our automatic placement on configurable rule sets. These rules can be created/modified in Annotation Settings.
- eVolve tab ⮞ Resources panel ⮞ Settings menu ⮞ Annotation button


Window Overview
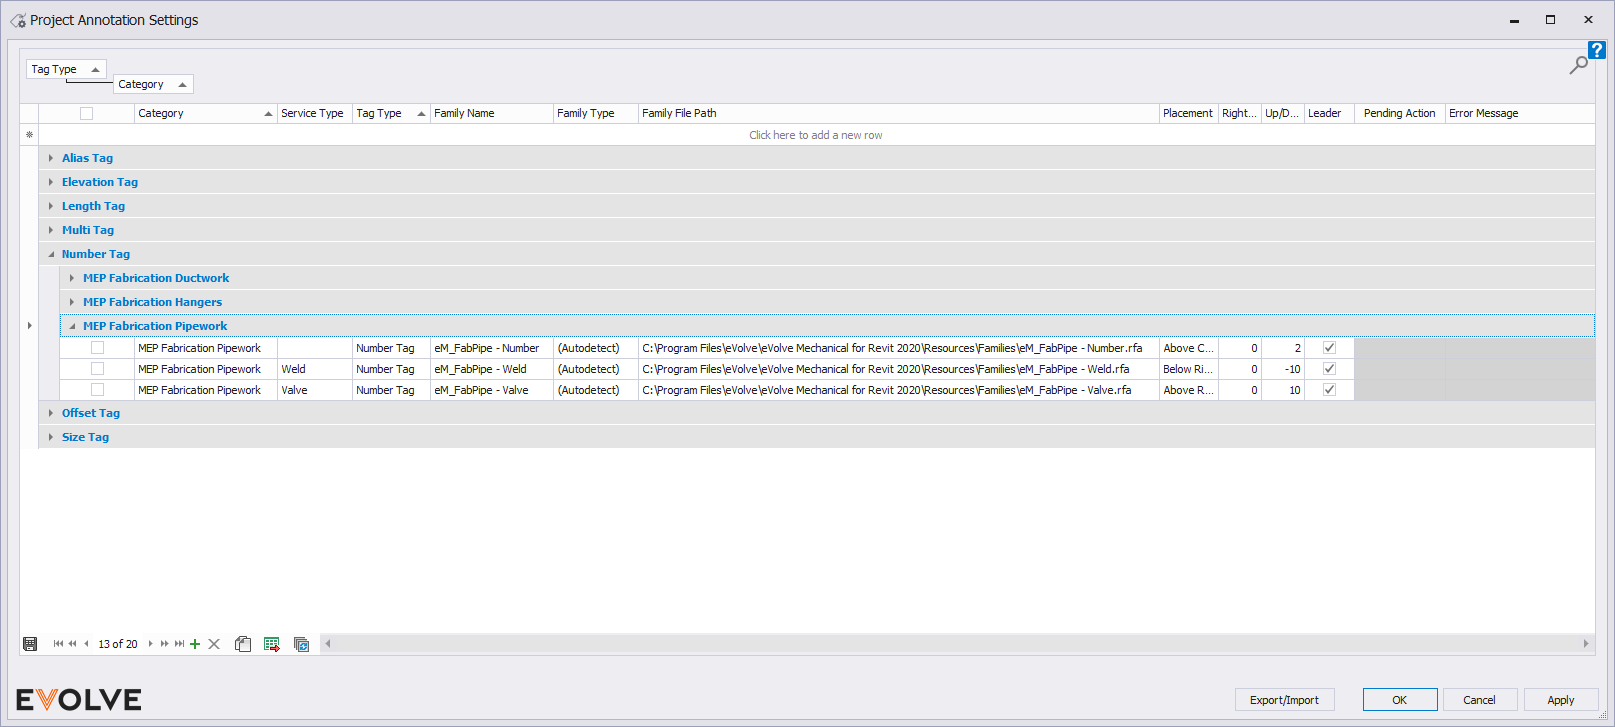
- Category - The Revit Category to be used for the annotation tag. This defines which elements the tag rule will apply to.
- Service Type - Defines tag to be used on elements with a specific Services Type.
- Tag Type - Assigns the type of tag. (Size, Offset, Number, etc.)
- Family Name - Name of Annotation Family to be used.
- Annotation Family File Path - If the annotation family does not exist in the project, eVolve will load from this file location.
- Placement - Adjust the placement of tags above, below, and middle alignments.
- Right/Left Adjust - adjust the values of right/left tag placement in a positive or negative value.
- Up/Down Adjust - adjust the values of up/down tag placement in a positive or negative value.
- Leader - Check this box to have leaders on while placing tags.
- Export/Import - Export the current settings to a .xml file for backup or sharing with others. Import loads a user-defined .xml file into the current project.

Tips and Tricks
- Clicking in the row at the top of the grid labeled Click Here to Add More Rows allows you to create more rules and path these rules to custom tag families.
